Technology and the cloud provide unimagined possibilities to automate your practice, but at tax time or just prior to critical tax filing deadlines, you’ll inevitably have clients who bypass your portal, make an appointment and walk in with a shoebox full of receipts.
Even if it’s just a handful of clients, it’s an issue. More than likely, these are small business clients who either didn’t have time to input expenses into QuickBooks Online (https://intuit.me/2KLdm1A) or figured it was much easier for you to handle.
Now, there’s a better solution that’s quick and easy: Receipt Capture, a feature that has been available in QuickBooks® Self-Employed and is now part of QuickBooks Online. This is a key feature you’ll want to check out to make life easier for you and your clients, while supersizing your productivity and demonstrating your knowledge as a trusted advisor.
With Receipt Capture, you and your clients can snap and store receipts digitally in QuickBooks Online to save hours of labor. Once receipts are uploaded to QuickBooks Online, they are automatically categorized and matched to transactions. The result? Everything is organized and ready at tax time – and best of all, there’s no shoebox!
Receipt Capture is currently available to U.S. customers using all versions of QuickBooks Online: Simple Start, Essentials, Plus, and Advanced.
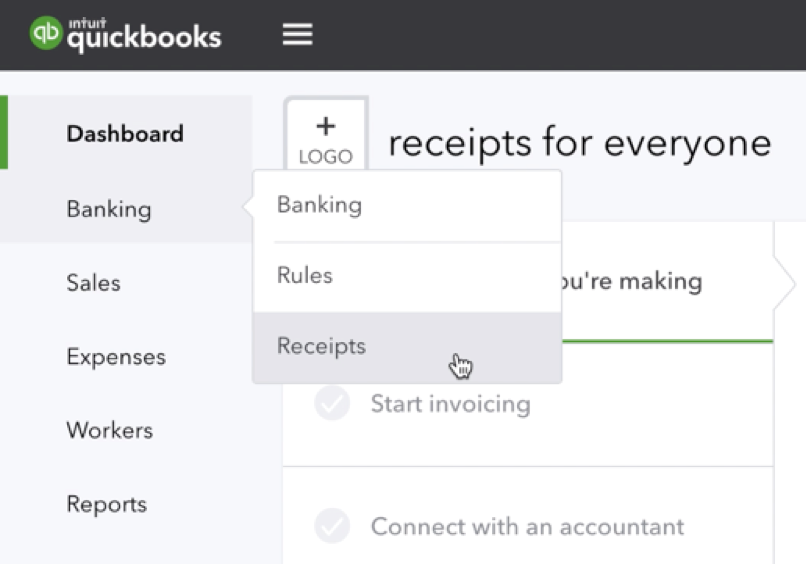
How Receipt Capture Works:
In QuickBooks Online, you can add receipts in three different ways:
- Scan the receipts directly through the QuickBooks mobile app – more on that below.
- Drag and drop the image, or upload it into QuickBooks Online.
- Forward the receipt by email.
Once submitted, QuickBooks Online reads the receipts, extracts the information, and automatically matches the receipt to a transaction. And, if there’s no match found, you can easily create a new transaction.
Although Receipt Capture is easy and straightforward, here are a few best practice tips:
- Add senders: The first thing you’ll want to do is add senders; otherwise, the only people that will be able to email receipts are the Master Admin of the QuickBooks account and Accountant Firm users. To do this, go to Banking > Receipts > Manage senders. Those users with at least vendor permissions are able to send receipts.
- Register your email: Initially, you’ll be asked to register your email for Receipt Capture in QuickBooks Online. If you’re logged in as the Accountant Firm user, that email address connects this client account.
- Connect to multiple clients: It is possible to connect to multiple clients; in order to send to a different client, you need to toggle your Accountant user name to “off” in the active client account, switch to another client QuickBooks account, toggle your Accountant user on, and then send the email.
- Become familiar with the Receipts Center. The functionality is similar to bank feeds, another feature you and your client have probably been using. Just go to the “For Review” tab and “Reviewed” tab.
- Keep the books up to date: Ensure your clients’ books are updated by managing user permissions, editing details and deleting receipts any time you like.
In addition, if you add yourself as a sender in QuickBooks Online, it is always specific to that client. However, remember to remove yourself as a sender before adding yourself to another client. If you forget to do that, it should default to the most recent QuickBooks subscription to which you’ve added yourself.
QuickBooks Online Mobile App
Nowadays, clients could be working anywhere, any time, and the last thing anyone wants is a tall pile of receipts toppling over. Enabling the QuickBooks Online Mobile App (https://intuit.me/2NhmKfg) just makes good sense for many reasons, but especially when it comes to Receipt Capture. In addition to emailing, or dragging and dropping your receipts, you and your clients can also start the process in the app.
In the app, select “Receipt Capture” to take a picture and upload it to QuickBooks. When you log in via a computer, your receipt will be waiting for you to review.
To learn more about Receipt Capture, check out this QuickBooks support article: https://intuit.me/2zamJl7.
Thanks for reading CPA Practice Advisor!
Subscribe Already registered? Log In
Need more information? Read the FAQs
